
So, Firstly, Here are a few pictures of the condition of the Norman font in St Christopher, Lympsham.
As can be seen, The font has been painted over and stencilled lettering applied.
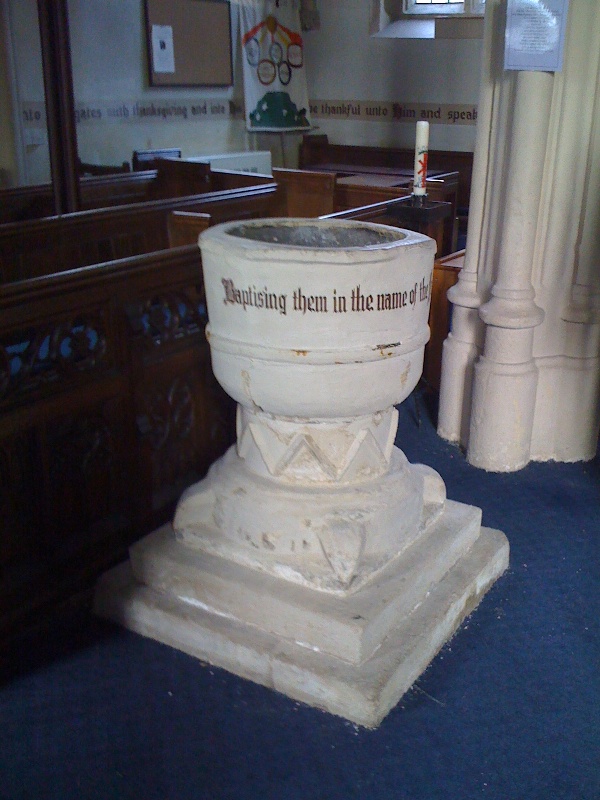
The paint is also covering an iron band which would have been installed as a support. If only they had known....
Another pic of works starting on day 1.

After assessment, the font was found to have many cracks and be in a worryingly unstable condition. The decision was made to remove the font to our workshop where the conservation works could be carried out. Below I have just cut the iron band free and revealed the extent of the damage it has caused.

The lead lining was removed to reveal the inside face of the stone. The lining was also cracked and eroded, It was decided to have it replaced.

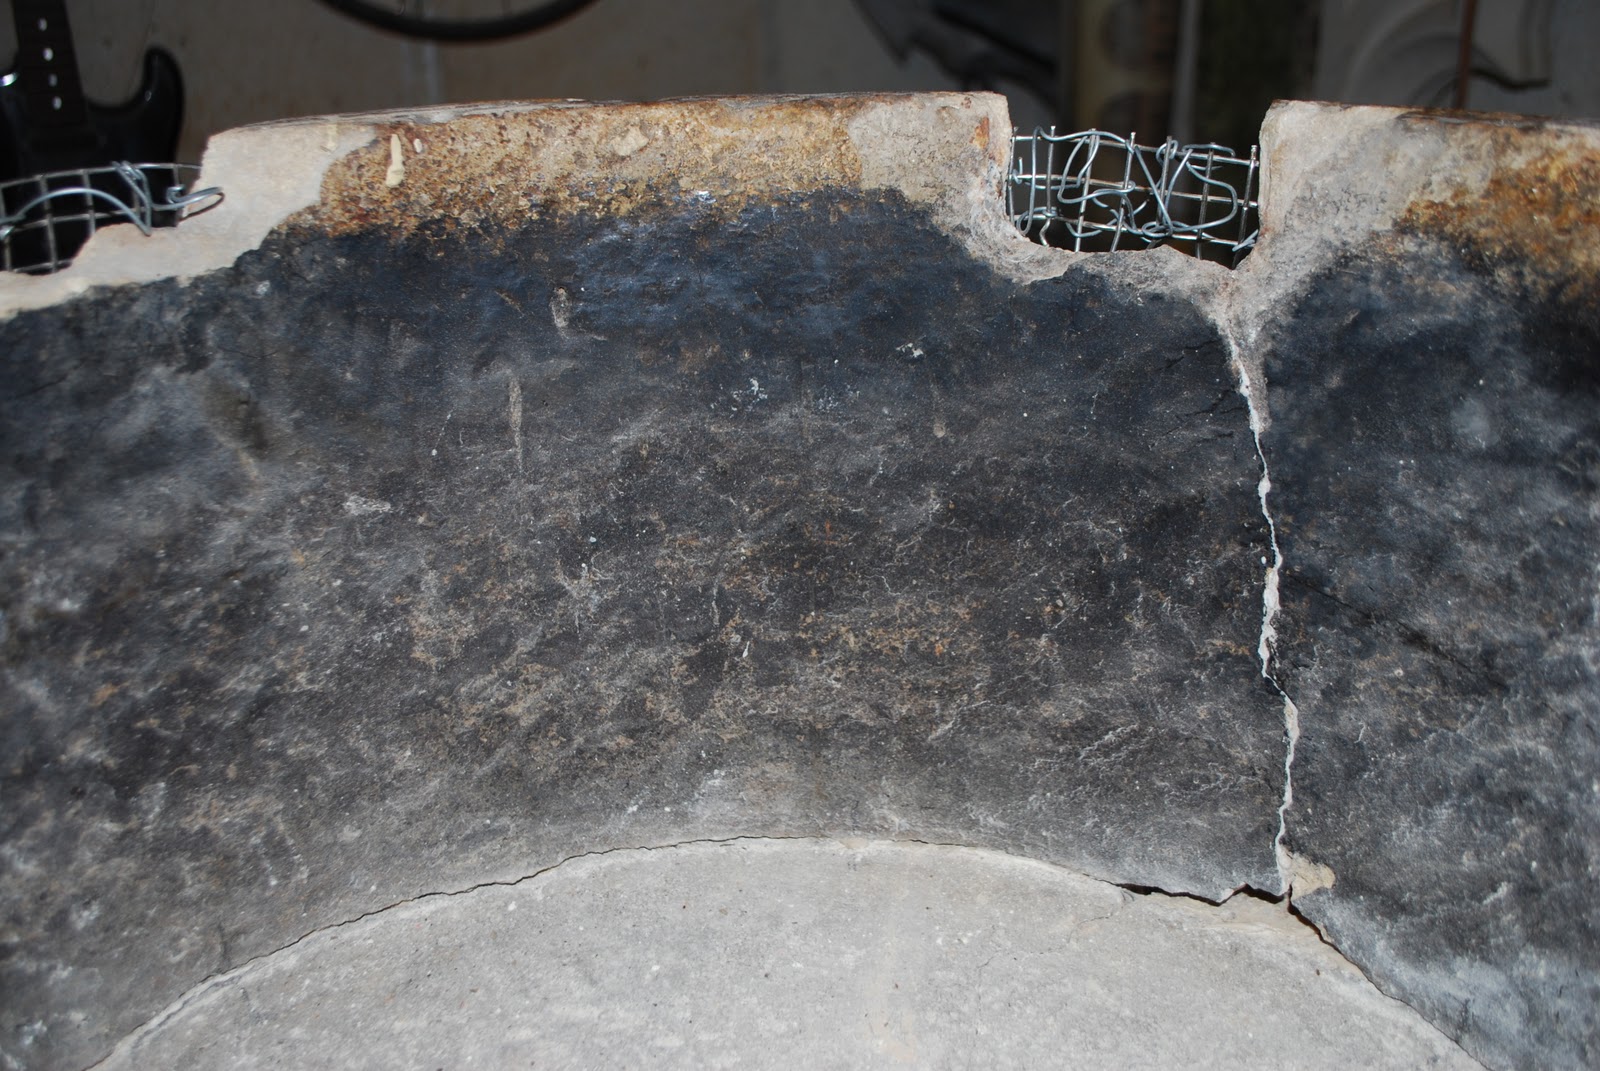
So, here it can be seen better the actual state of the stone. All this caused by an iron band. The paint probably hasn't helped much either.

You can see above and below that where the iron ring was placed on the font, there is a severe latitudinal crack all the way around, again, amazing the damage that can be caused yet completely unknown looking back at the first photo.

Here's a view of the damage seen inside the bowl.

Sections of the rim were found to be previous repairs.
Once assessment was complete we dismantled the many pieces of the font and began to rebuild it. for this we used a two part resin and stainless steel pins. We then had the font back as one piece but still had to tackle the paint.

Right, begin the painstaking task of removing the paint. layer upon layer of it too. The idea was to completely strip the paint back to the stone. To do this we used mallet and chisel to 'shock' off the top layers, the final layer was removed by scalpel.

Below, shocking off the top layers

For the areas that were found to be previous repair, we used stainless steel to form a mesh, resin fixed and to be used as an armature. This will give the lime mortar repairs something to hold on to when built up and when carbonated.

Starting to get somewhere with this project now. The font is in one piece, repairs are going on and the horrible paint has been removed.

Lisa has built up the first layers of the lime repairs to the missing sections of the rim. A key is left for the bonding of the top layer.

Lisa at work!


The new lead lining was carried out by Andy Jones, a specialist subcontract lead worker and roofer. What a task to line this font in a single piece of lead.

Very clever Andy!

This takes a lot of patience.

But... was a perfect fit.

The old lining came up, over and around the rim, but as we found it covered up these tooled lines on the rim we thought it better to leave it set in the bowl.

So, off back to site to have the bowl refixed. The paint has been removed from the rest of the masonry and all the sections have been re-bedded in their original positions.
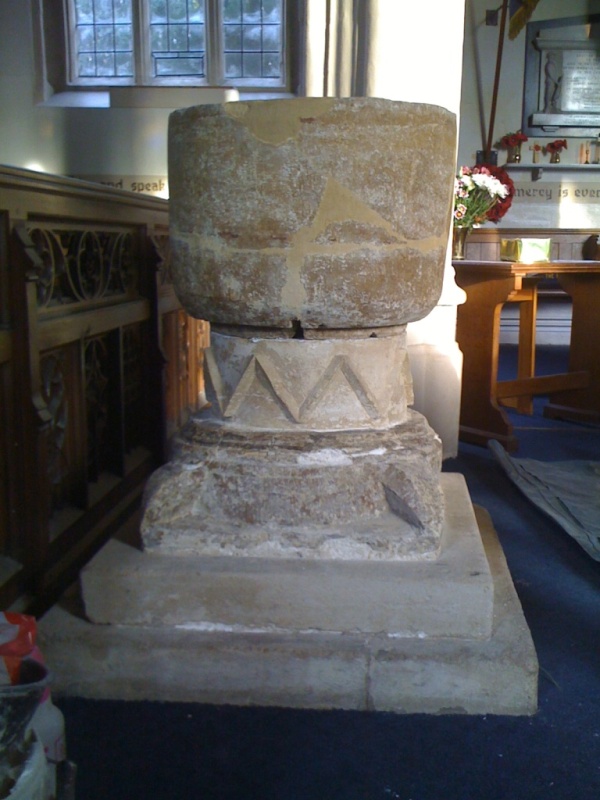
Above you can see how the mortar repairs that were applied stand out from the stone.
To lose this a little, as well as giving the font a breathable protective coating, a sheltercoat was applied.

1st Coat

Finished font from above.

Finished font with 2 coats of sheltercoat.
